

Camping a van is an ambitious project but within reach of anyone with great motivation. In addition to financial savings, converting a van into a camper will give you an unrivaled sense of fulfillment and freedom.
Otherwise, if you are not familiar with DIY, you can contact a specialized artisan who will convert the van and make the desired settings. In any case, if you are planning to camper van conversion.
in this article, you will find all the important information and the list of the main steps to follow. If you don’t want a camper van hired in the UK then Autotrader UK will help you to build a Camper Van.
Table of Contents
Design the interior of the van
When planning your future camper van, the first thing to do is create a drawing to understand the right proportions. You can first sketch your campervan design, the computer graphics application for 3D modeling.
Depending on your vehicle model, you will find and download free design models in the 3D Warehouse. You can use a dash cam for capturing the moment.
Preparations for camping
Once your DIY van conversion project is finished, you can already imagine the splendor of your new campervan when the job is finished. But the real work only starts now!
Cleaning the vehicle
The passenger compartment of the vehicle must be empty and clean. You will need to remove any coverings and the dividing plate with the cockpit and carry out a good general cleaning and make a good anti-rust treatment.
Openings: Windows for campers and ventilation
Suppose you have planned to install special windows for campers to have more brightness and prevent condensation and humidity. In that case, you will have to take care of making the external openings before starting the construction work.
Take the correct dimensions with extreme care before cutting the sheet and respect the safety standards to weaken the body too much!
Preparation for lighting and wiring
At this point, before proceeding with the insulation of the van, it is necessary to know where to place the spotlights for the lighting of the computerized van, to fix the channels on the roof and along the walls of the bodywork, in which we will run the cables after having insulated our van.
The insulation of the converted van: van isolation
A converted van’s thermal insulation is essential for successfully transforming the van into a DIY camper van. There are several materials, but not all of them have the same prices, features, and effectiveness.
Glass wool (or rock wool) is a high-performance thermal insulator and is especially inexpensive. If you opt for this insulator, you should provide easy access to the van insulation so you can easily replace it.
- Extruded polystyrene (XPS) panels are probably the best thermal insulators for an RV van, thanks to their rigidity, limiting infiltration, and humidity. The disadvantages are the higher price and poor soundproofing.
- The multilayer heat-reflective insulators are very flexible aluminum reflector that adapts to the rounded shapes of an RV and installs very easily with spray glue. However, it is quite expensive, the sound insulation is poor, and their thermal resistance is average.
- The expanded polyurethane foam is an excellent insulator available in liquid spray cans, which expand directly to the van wall. Very practical for hard-to-reach areas. The main drawback is that it gets foul during installation.
Choosing the insulation of the van is one of the most delicate when starting a do-it-yourself camper. Once the van has been insulated, the converted van’s walls and ceiling must be covered with plywood sheets, cut, and shaped to measure.
Only then can we install the spotlights, and the electrical sockets and take care of setting up the entire van.
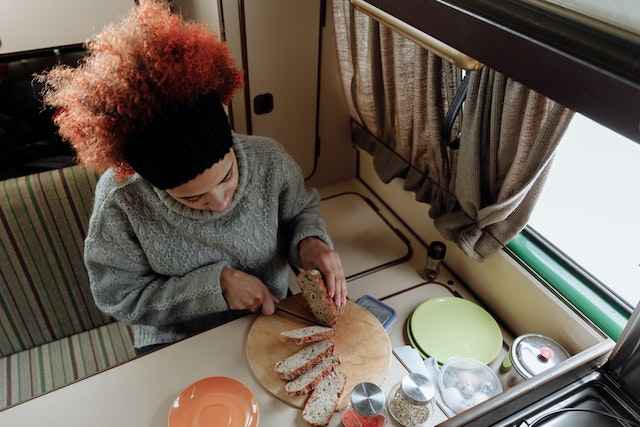
Preparation of the van: the furniture
Does the main question arise how to live in a van? We need to install furniture in the van. You can decide whether to opt for a camper kit, build do-it-yourself furniture, or use recycled furniture to furnish the converted van.
The first option is to purchase a camper kit from a professional bodybuilder. It is often a removable kit, so you will not be obliged to homologate your van in a motor home.
For real do-it-yourself computerization: prepare your project, arm yourself with strips, plywood, and wooden planks, and create the set-up that best suits you!
The do-it-yourself electrical system of the converted van
The installation of an electrical system for a camper is not strictly necessary if you want to travel with the bare minimum, without appliances or heating, but let’s face it, the lighting and the convenience of a refrigerator and some electrical sockets in the campervan make the difference.
Calculation of energy consumption
Before installing the RV electrical system, take the time to list the devices you plan to use and calculate the energy consumption. These considerations are essential for a correct voltage choice (24, 12, or 220 Volt). Usually, a camper’s electrical system is powered by a battery with a voltage of 12 V.
Batteries, inverters, and solar panels for campers
Once you have identified your system’s electrical loads, you will need to install at least one auxiliary service battery (AGM, Gel, or Lithium ) and an electrical panel to make the connections.
Based on your energy needs, you can decide to mount two service batteries and connect them in series or parallel, depending on the need for voltage and the type of batteries used.
Heating for your converted van
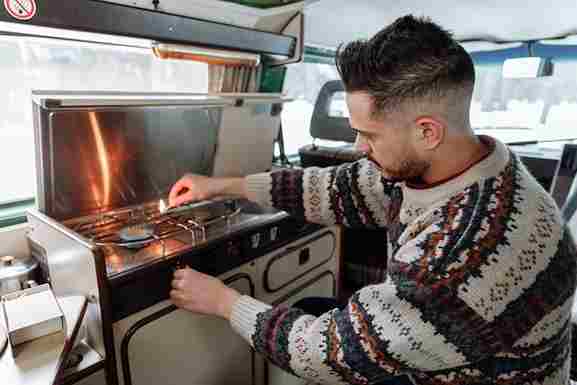
To prevent cold weather during the winter, you can think about having your DIY camper van equipped with a stove or heating system for an RV. You can essentially choose between 3 heating solutions: auxiliary, fixed diesel, or fixed gas.
Auxiliary heating
- A portable electric heater: effective but consumes a lot. It has a major impact on the consumption of your van’s battery.
- A gas stove with butane cartridges is a good compromise if you don’t want to go through the homologation process after converting your van to an RV.
- Diesel heating: The system connects directly to the fuel tank and operates at 12V or 24V. There are two types of heating: the RV boiler and the air heater. Among the most famous: are Webasto, Eberspächer, and Planar. With quite high costs, from 500 to 900 €.
Gas heating
For gas heating, you need to be very vigilant during installation and avoid excess carbon monoxide at all costs. One of the advantages is that the gas vehicle gas heater is quieter than the diesel heater.
The hydraulic system of a converted van
For state-of-the-art computerization, the next phase is the design of a hydraulic system. A basic plumbing system in a motorhome includes two tanks (the drinking water tank and the gray water tank ) and a sink with a tap.
Unless the jerry cans are stowed high above the tap, you will need an RV water pump, which will serve to bring water from the tank to the tap. Install the gray water tank in an easily accessible area, from below, to easily drain the camper’s wastewater.